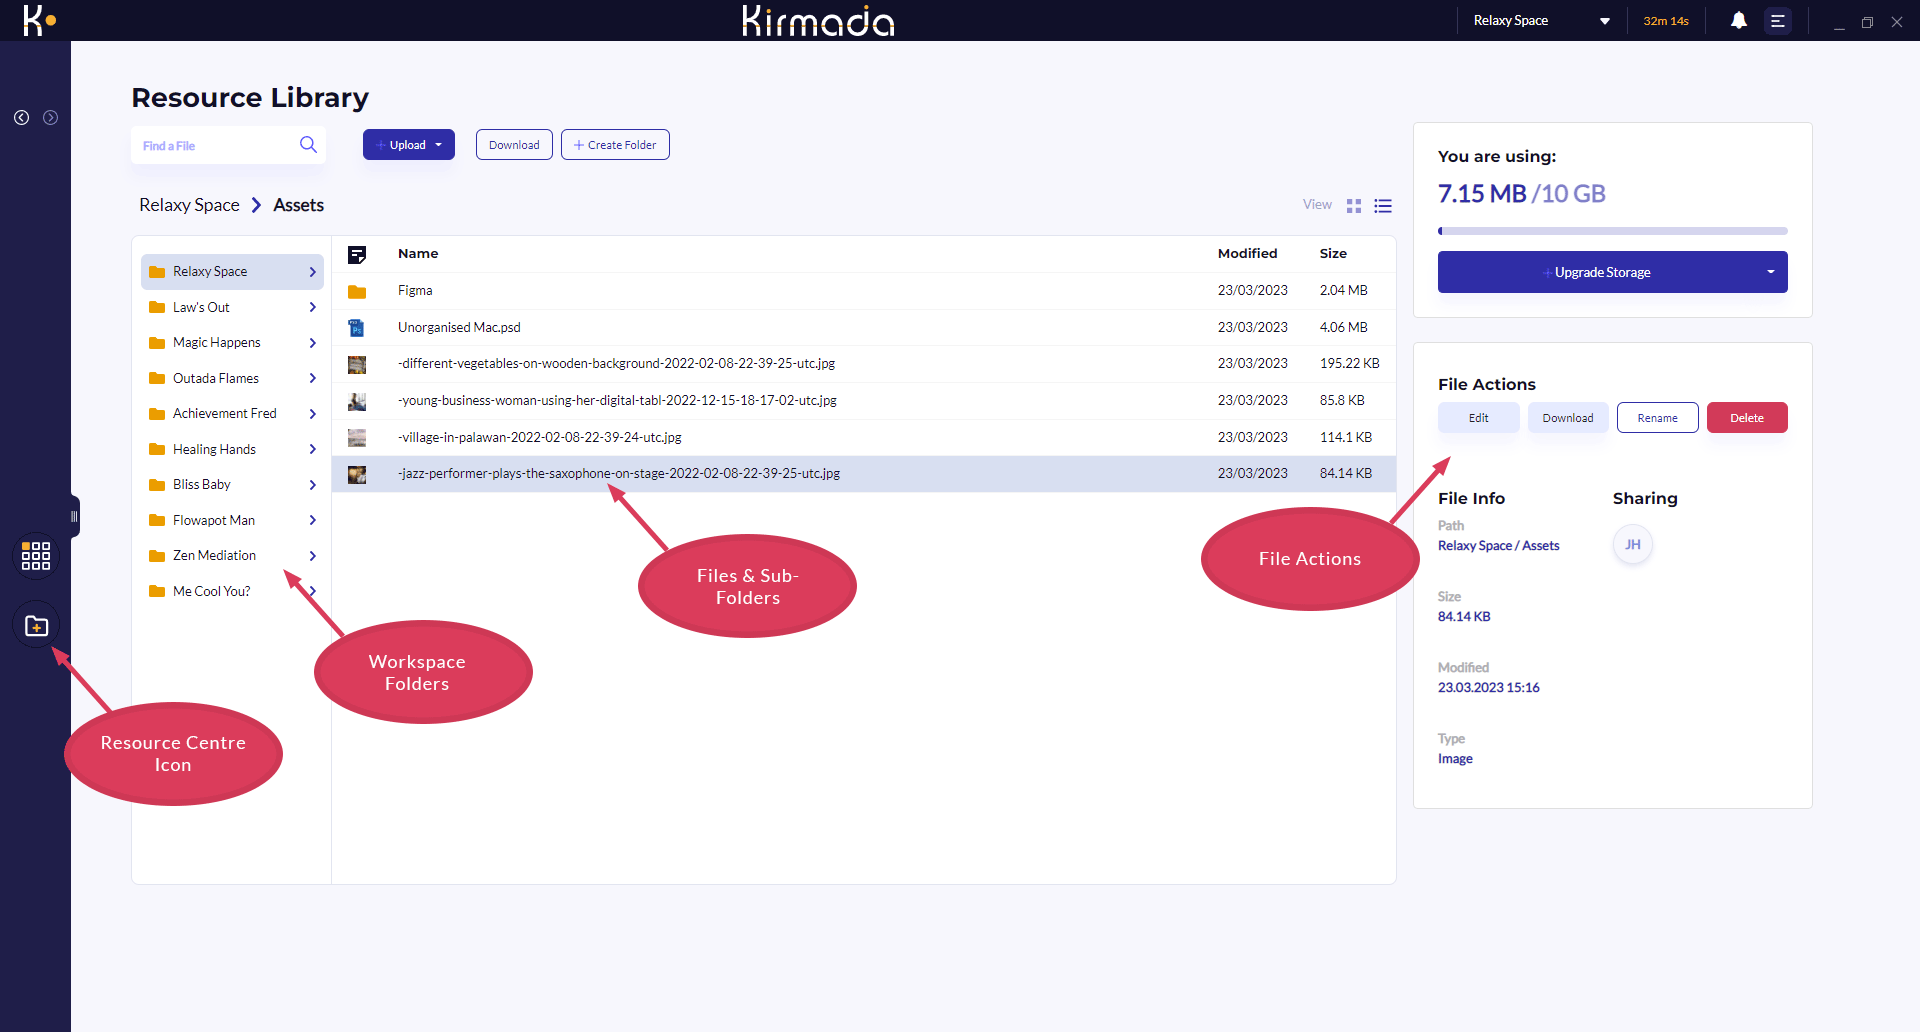
You can access the Resource Centre by clicking the Resource Centre icon on the Left Navbar (the folder icon), as shown below.

The Resource Centre works in a similar way to other cloud storage services like DropBox or OneDrive, with the top level folders on the left, the folder contents in the middle and various file actions and file properties on the right.
A top-level folder is created for each of your Workspaces automatically.
When you navigate down through sub-folders, breadcrumb navigation above the folders lets you go back to higher-level folders.
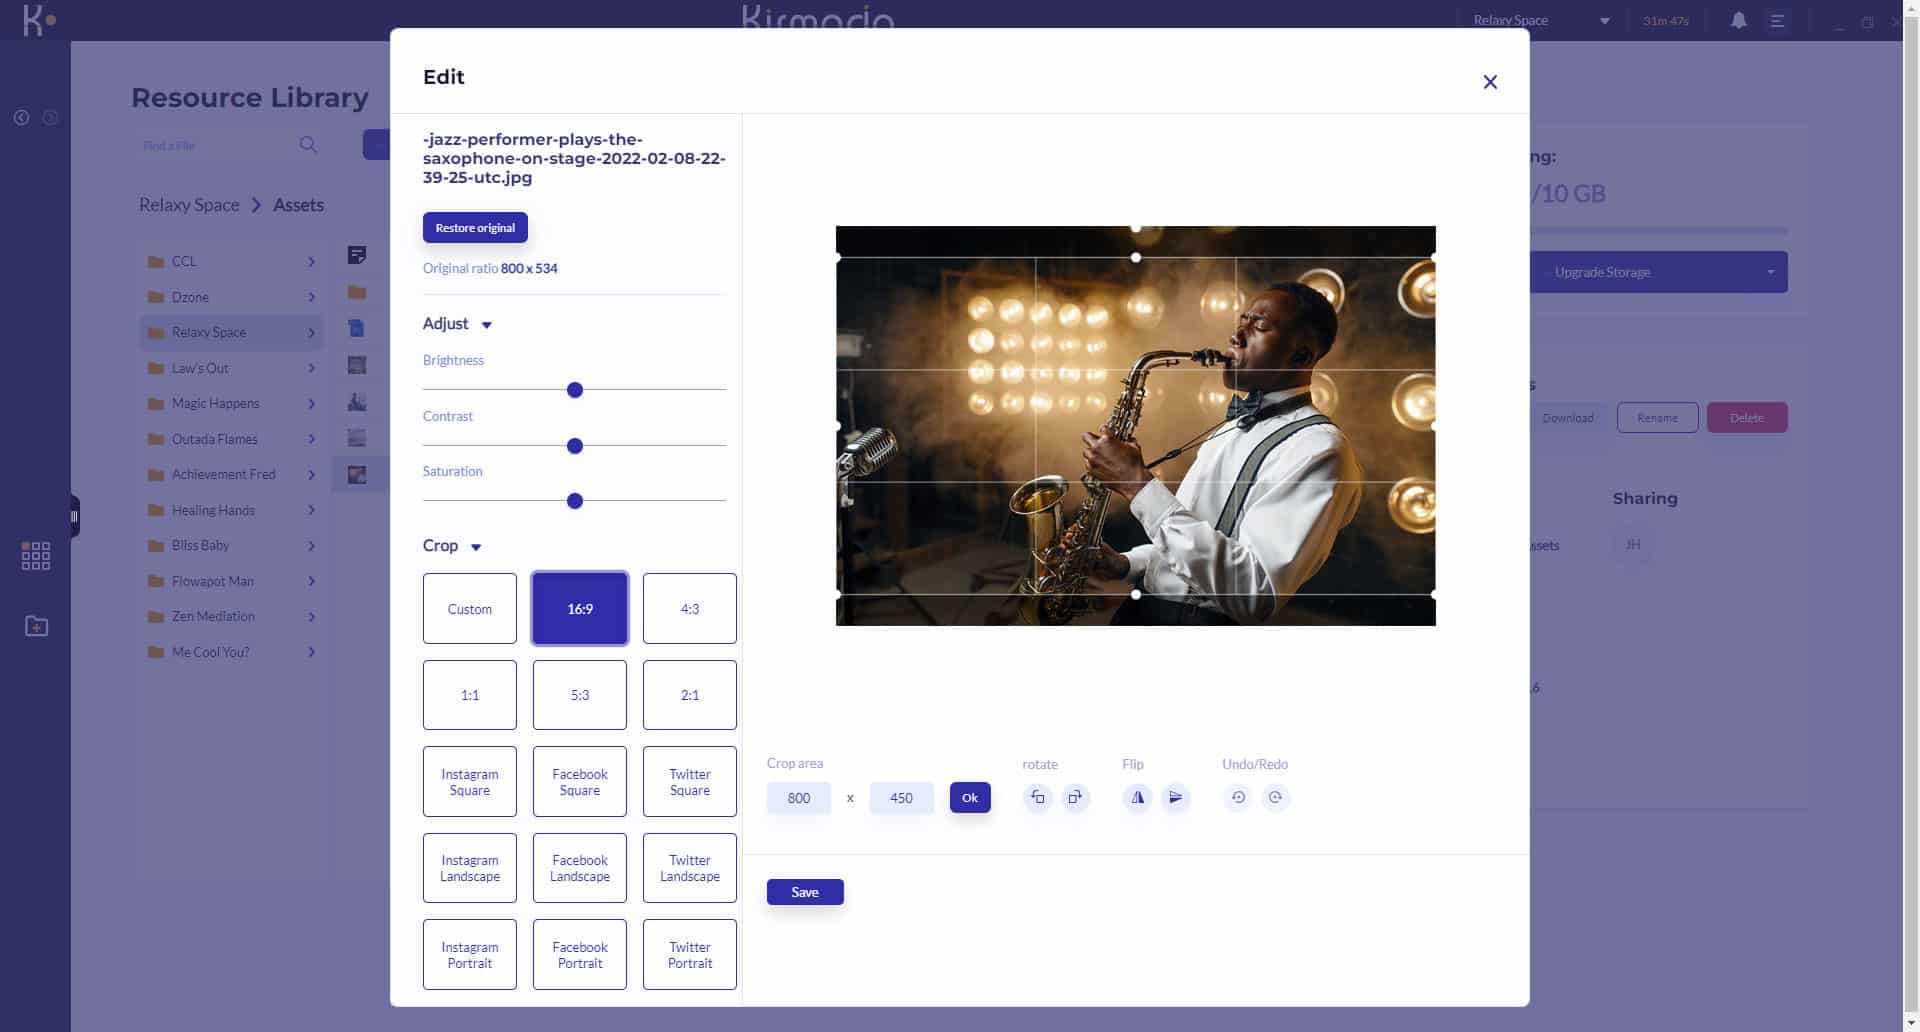
If you select a graphics file, a preview panel will display the image for you, but you can also Edit the image by clicking the Edit button.

The Image Editor gives you basic editing controls over the image such as brightness, contrast rotating and flipping etc, and you can also crop images to the correct proprtions needed for various social platforms (or custom crop by typing the ratio in the Crop Area).
After you’ve edited the image you can save it as a copy so the original file is preserved. If you ever need to restore the original file, there’s a button to do that directly above the Adjustment options.


